Step-by-Step Guide - Implement Custom Domains in Your Node.js SaaS App


Looking for an efficient way to add custom domains to your Node.js SaaS application?
You've come to the right place! In this comprehensive guide, we'll walk you through the process of implementing custom domains using the SaaS Custom Domains API, step by step.
Boost your app's user experience, strengthen your branding, and give your customers the flexibility to use their own domain names with our easy-to-follow tutorial.
The entire process should take between 5 and 20 minutes, depending on whether you want to complete step 5, which is optional.
Steps:
Create an API token (1 minute)
Create an upstream (1 minute)
Create a custom domain (1 minute)
Create a CNAME for the custom domain (1 minute)
Handle forwarded requests in the Node.js application (optional, 5-15 minutes)
Step 1: Grab your API token
First things first, head over to your account settings and find your API token.

With the API token in hand, you'll be ready to interact with the SaaS Custom Domains API in no time!
Step 2: Set up your upstream
An upstream is just a fancy term for the server that gets requests sent by the reverse proxy. In our case, it's the Node.js application server where you want to receive all those incoming requests.
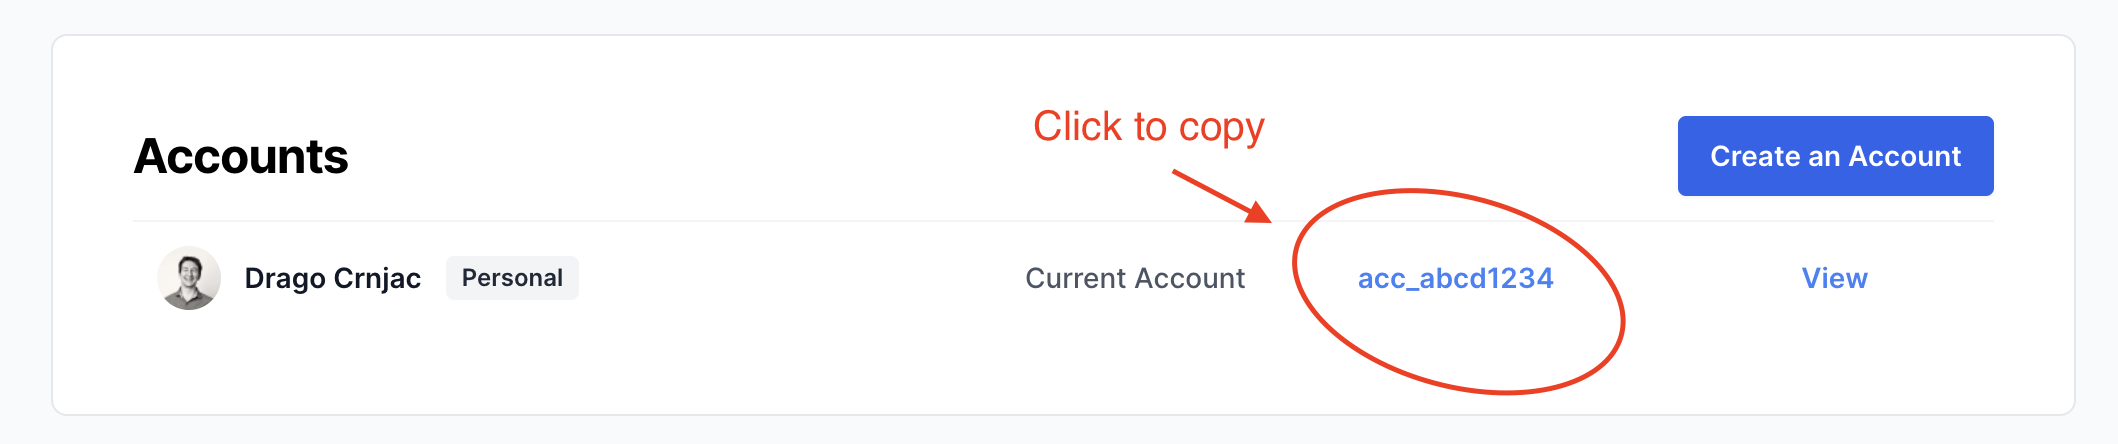
First off, grab your account UUID from your account settings.
Let's say your app is located at app.example.com. Check out the Node.js script below to create an upstream:
const axios = require("axios");

const accountUuid = "your_account_uuid";
const token = "your_api_token";
const baseUrl = "https://app.saascustomdomains.com/api/v1";

const createUpstream = async () => {
  try {
    const response = await axios.post(
      `${baseUrl}/accounts/${accountUuid}/upstreams`,
      {
        host: "app.example.com",
      },
      {
        headers: {
          Authorization: `Bearer ${token}`,
          "Content-Type": "application/json",
        },
      }
    );

    console.log(response.data);
  } catch (error) {
    console.error(error);
  }
};

createUpstream();
Congratulations! You've successfully created your first upstream. To learn more about upstreams and their capabilities, consult the Upstreams API Documentation.
Step 3: Register a custom domain
Now that we have our upstream in place, let's create a custom domain that will forward requests to it. Let's say a customer wants to add app.mydomain.com as a custom domain, we can use the following code to achieve that
const accountUuid = "your_account_uuid";
const upstreamUuid = "your_upstream_uuid";
const token = "your_api_token";
const customDomainHost = "app.mydomain.com";

const createCustomDomain = async () => {
  try {
    const response = await axios.post(
      `${baseUrl}/accounts/${accountUuid}/upstreams/${upstreamUuid}/custom_domains`,
      {
        host: customDomainHost,
      },
      {
        headers: {
          Authorization: `Bearer ${token}`,
          "Content-Type": "application/json",
        },
      }
    );

    console.log(response.data);
  } catch (error) {
    console.error(error);
  }
};

createCustomDomain();
Well done! You've created your first custom domain. To learn more about custom domains and everything you can do with them, check out the Custom Domains API Documentation.
Step 4: Configure the CNAME for the custom domain
The custom domain has now been created in our system, but nothing will happen if you visit it. Why? To make the custom domain work, you need to create a CNAME record for app.mydomain.com and point it to in.saascustomdomains.com. In practice, you would instruct your customer to create the CNAME record on their domain.
After creating the CNAME record, it may take a few minutes for the DNS changes to propagate.
Once the DNS changes have propagated, when you visit the custom domain app.mydomain.com, your request will be forwarded to your upstream host — app.example.com — where your Node.js application is hosted.
Note: If your customers are using a DNS provider like Cloudflare, which can also act as a proxy, make sure they set the proxy status to DNS only (make the little cloud icon gray).

Congratulations! The requests are now being forwarded from your custom domain to your Node.js application.
Depending on your use case and how your Node.js application is implemented, this may be exactly what you wanted, and there's nothing else you need to do.
However, you might want to implement some business logic depending on the custom domain from which the request is originating. If that's the case, read on.
Step 5: Handle forwarded requests in the Node.js application (optional)
You might want to customize your app's appearance or fetch specific data from your database, depending on the custom domain.
Incoming requests from a custom domain have the X-Served-For header set to that domain. For instance, if a request comes from app.mydomain.com, the X-Served-For header will be set accordingly.
In your Node.js application, you can leverage this header to implement custom logic based on the domain. Here's a basic example using the Express framework:
const express = require('express');
const app = express();

app.use((req, res, next) => {
  const customDomain = req.header('X-Served-For');

  if (customDomain) {
    console.log(`Request from custom domain: ${customDomain}`);
    // Implement your custom logic here, e.g., show a different logo or pull different data from the database.
  }

  next();
});

app.get('/', (req, res) => {
  res.send('Hello World!');
});

app.listen(3000, () => {
  console.log('Server is running on port 3000');
});
In conclusion, implementing custom domains for your Node.js SaaS app has never been easier. By following our step-by-step guide, you'll be able to provide a more personalized and professional experience for your customers.
So why wait? Get started with the SaaS Custom Domains API today and elevate your Node.js application to new heights. If you need any assistance, feel free to reach out to us via email or chat at saascustomdomains.com.